 Loading
Loading
Loading
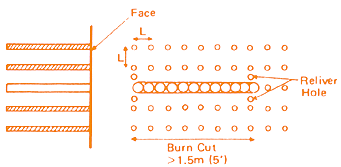
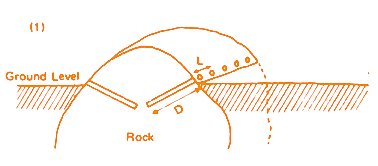
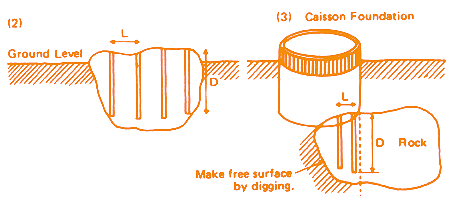
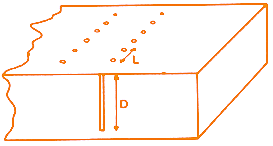
These charts show recommended hole sizes and spacing for boulders and rock faces. Measure your material, pick the closest diagram, and cross-check with our general hole-design page before drilling.
| d | 38 - 44 mm |
| 1 1 / 2 "- 1 3 / 4 " | |
| D | 70 % of Height |
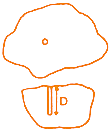
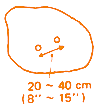
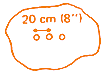
| d | 38 - 44 mm |
| 1½ "- 1¾ " | |
| L | 30 - 60 cm |
| 1 '- 2 ' | |
| D | Shown in Figure |
| d | 38 - 51 mm |
| 1½ "- 2 ' | |
| L | 60 - 90 cm |
| 2 '- 3 ' | |
| D | 90 % of Height |
| d | 32 - 35 mm | 44 - 51 mm |
| 1¼ "- 1 3/8 " | 1¾ " - 2 " | |
| L | 30 - 40 cm | 60 - 90 cm |
| 1 '- 1 ' 4 " | 2 '- 3 ' | |
| D | 70 % of Height | |
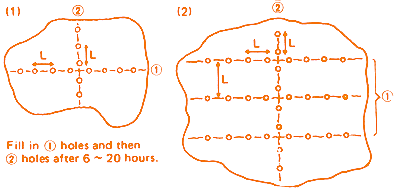
| d | 32 - 35 mm | 44 - 51 mm |
| 1¼ "- 1 3/8 " | 1¾ " - 2 " | |
| L | 20 - 30 cm | 40 - 50 cm |
| 8 "- 1 ' | 1'4 "- 1'8" | |
| D | 90 % of Height | |
| d | 44 - 51 mm |
| 1¾ " - 2 " | |
| L 1 | 30 - 40 cm |
| 1 '- 1'4" | |
| L 2 | 60 - 90 cm |
| 2 '- 3 ' | |
| D | Add 5 % of Height |
| 80° - 90° |
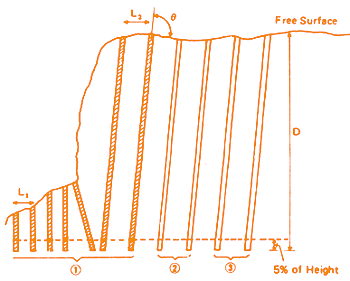
Tighten hole spacing at the toe and break forward from the free face, row by row. Leaving the toe undrilled usually gives poor results. Front rows (up to the sixth) can be filled at once. For easier removal, fill one bore first, then rows two and three after waiting 6–20 hours.
| d | 38 - 51 mm |
| 1½ "- 2 " | |
| L | 30 - 60 cm |
| 1 '- 2 ' | |
| D | 1 - 1.8 m |
| 3 '- 6 ' | |
| 45° - 60° |
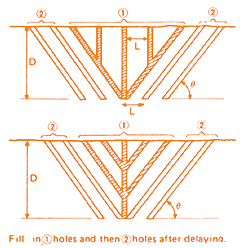
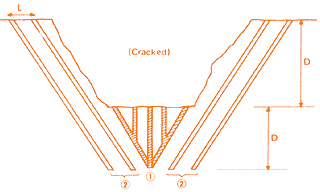
| d | 38 - 51 mm |
| 1½ "- 2 ' | |
| L 1 | 40 - 60 cm |
| 1'4 "- 2 ' | |
| L 2 | 30 - 40 cm |
| 1 '- 1'4" | |
| D | 1 - 1.8 m |
| 3 '- 6 ' |
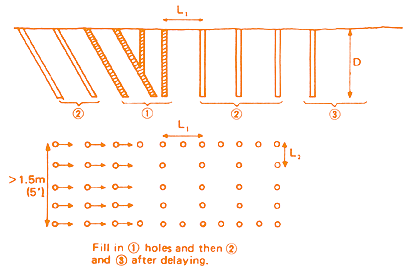
| d | 38 - 44 mm |
| 1½ "- 1¾ " | |
| L | 30 - 60 cm |
| 1 '- 2 ' |